Baking Tips for Beginners

We have all been there. You see a gorgeous picture of a towering chocolate cake or a tray of perfect golden cookies on Instagram, and you think, “I can do that.” You buy the ingredients, follow the steps, and… the cake sinks in the middle, or the cookies come out as hard as hockey pucks. It’s discouraging, isn’t it?
Unlike cooking, where you can toss in a handful of herbs or add a splash of wine to taste, baking is a science. It relies on precise chemical reactions between flour, fat, sugar, and heat. But don’t let the word “science” scare you. You don’t need a chemistry degree to bake delicious treats; you just need the right roadmap.
In this extensive guide, I am going to share the essential baking tips for beginners that I wish someone had told me when I started. We will move beyond the vague instructions and dive into the “why” and “how” of baking success. From understanding why your oven might be lying to you, to the single most important tool under $20 that will change your life, this guide covers it all. Let’s turn your kitchen anxiety into confidence and get you baking like a pro.
Tools you really need (and don’t)
One of the biggest barriers for new bakers is the assumption that you need a kitchen full of expensive gadgets. The truth? You don’t. While a $500 stand mixer is nice, it is not a requirement for making a great brownie. However, there are a few non-negotiables.
The Absolute Essentials
If you are building your starter kit, these are the items that directly impact the chemistry of your baking.
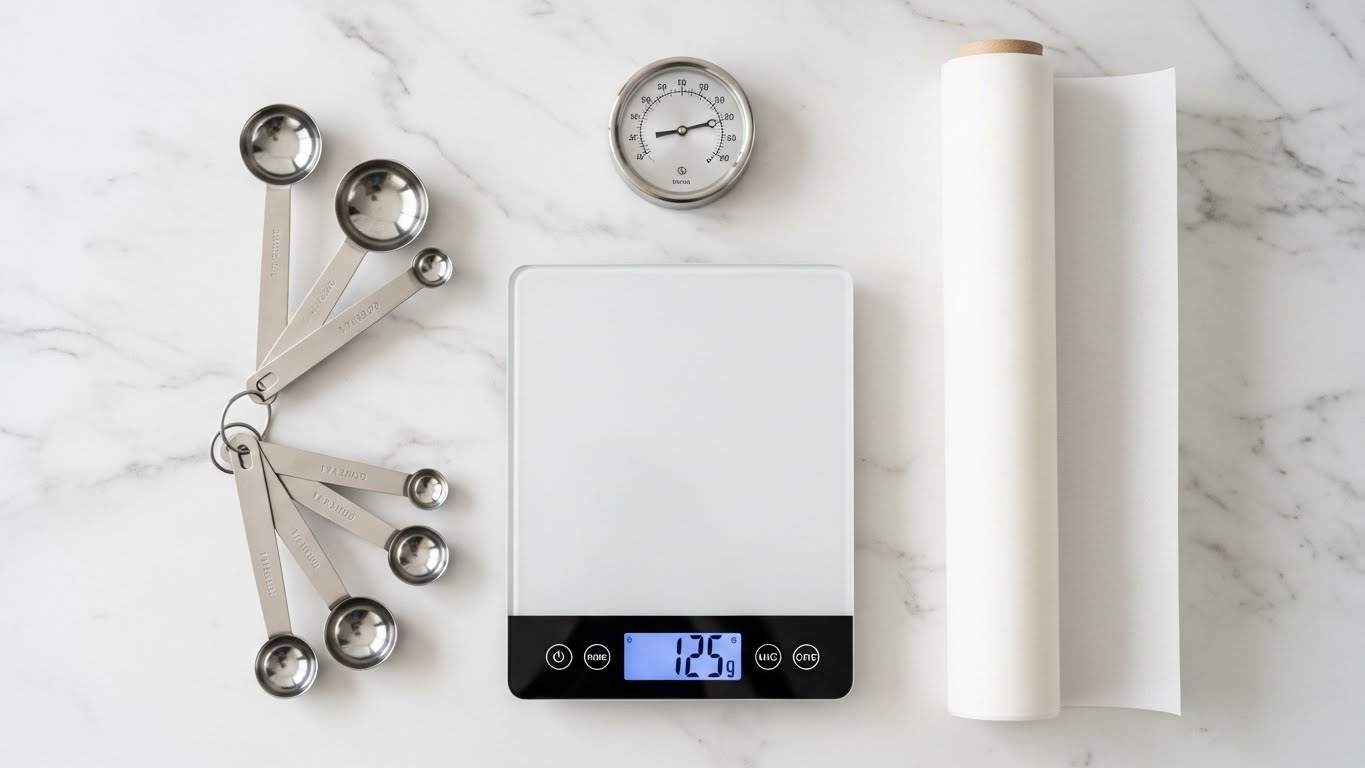
- A Digital Kitchen Scale: If you take away only one of these baking tips for beginners, let it be this: buy a scale. Weighing ingredients is the only way to guarantee accuracy (more on this later).
- Oven Thermometer: Most home ovens are calibrated incorrectly. Your dial might say 350°F, but the inside might actually be 325°F or 375°F. A cheap hanging thermometer tells you the truth.
- Parchment Paper: Not wax paper, and not foil. Parchment paper is non-stick and heat-resistant, ensuring your cookies slide right off the pan.
- Measuring Spoons and Cups: Even if you use a scale for flour, you’ll still need spoons for baking soda, vanilla, and spices.
- A Light-Colored Metal Pan: Dark pans absorb heat too fast, burning the bottoms of cookies. Glass pans conduct heat slowly. Light aluminum is the gold standard.
The “Wait Until Later” List
Don’t blow your budget on these until you are sure you love baking.
- Bread Maker: It takes up counter space and you can make better bread by hand or with a mixer.
- Fancy Piping Tips: A Ziploc bag with the corner snipped off works fine for basic frosting.
- Sifter: A fine-mesh strainer works perfectly for sifting flour and dusting sugar.
Simple rules for accurate measuring
In cooking, a “cup” of chopped onions can be heaping or scant, and the soup will still taste good. In baking, a cup of flour that is packed too tight can ruin a recipe instantly. This is where most baking tips for beginners fail to emphasize the gravity of the situation.

The “Scoop and Level” Method
If you must use volume measurements (cups), never dip the measuring cup directly into the bag of flour. This packs the flour down, and you can accidentally add up to 20% more flour than the recipe intends, leading to dry, dense cakes. The Correct Way:
- Fluff the flour in the bag with a spoon.
- Gently spoon the flour into your measuring cup until it’s mounded over the top.
- Use the back of a knife to scrape (level) off the excess.
Weight vs. Volume: The Scale Debate
In professional bakeries, you will never see a measuring cup. We weigh everything in grams. Why? Because 1 cup of flour can weigh anywhere from 120g to 150g depending on humidity and how it’s packed. A digital scale removes the guesswork. If a recipe calls for 125g of flour, and you add 125g, your result will be consistent every single time.
Pro Tip: When looking for recipes online, try to find ones that offer “Metric” toggle buttons. This is a sign of a well-tested recipe.
Understanding Your Ingredients
Ingredients are your building blocks. Understanding how they function is crucial for mastering baking tips for beginners.
Temperature Matters (The Room Temp Rule)
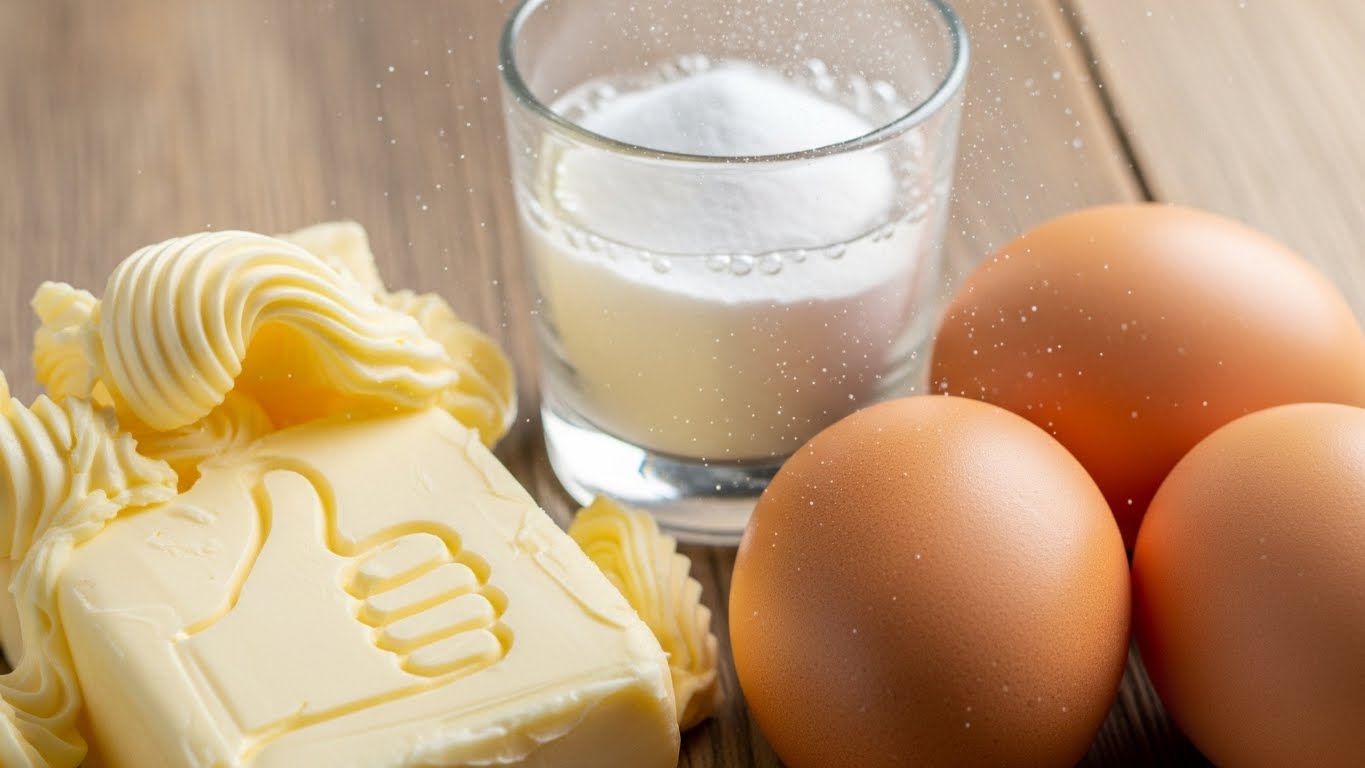
When a recipe calls for “room temperature butter” or “eggs,” do not ignore it. Room temperature ingredients emulsify (blend) together much better than cold ones.
- Butter: Soft butter traps air when beaten with sugar. This air expands in the oven, creating a fluffy texture. Cold butter won’t trap air; melted butter makes things greasy.
- Eggs: Cold eggs can shock your batter, causing the fat to curdle and separate.
Leavening Agents: Freshness Check
Baking soda and baking powder are the muscles that lift your cake. Over time, they lose potency.
- Test Baking Soda: Mix a teaspoon with vinegar. If it fizzes aggressively, it’s good.
- Test Baking Powder: Mix a teaspoon with hot water. It should bubble immediately.
Common beginner mistakes to avoid
We learn by doing, but we can also learn by avoiding the mistakes of others. Here are the most frequent pitfalls I see.
Overmixing the Batter
This is the number one enemy of tender baked goods. Flour contains gluten (protein). When you mix flour with wet ingredients, gluten strands form.
- Good for: Bread (we want chewiness).
- Bad for: Cakes, muffins, and pancakes (we want tenderness).
- The Fix: Mix your dry and wet ingredients just until the white streaks of flour disappear. Lumps in muffin batter are actually okay!
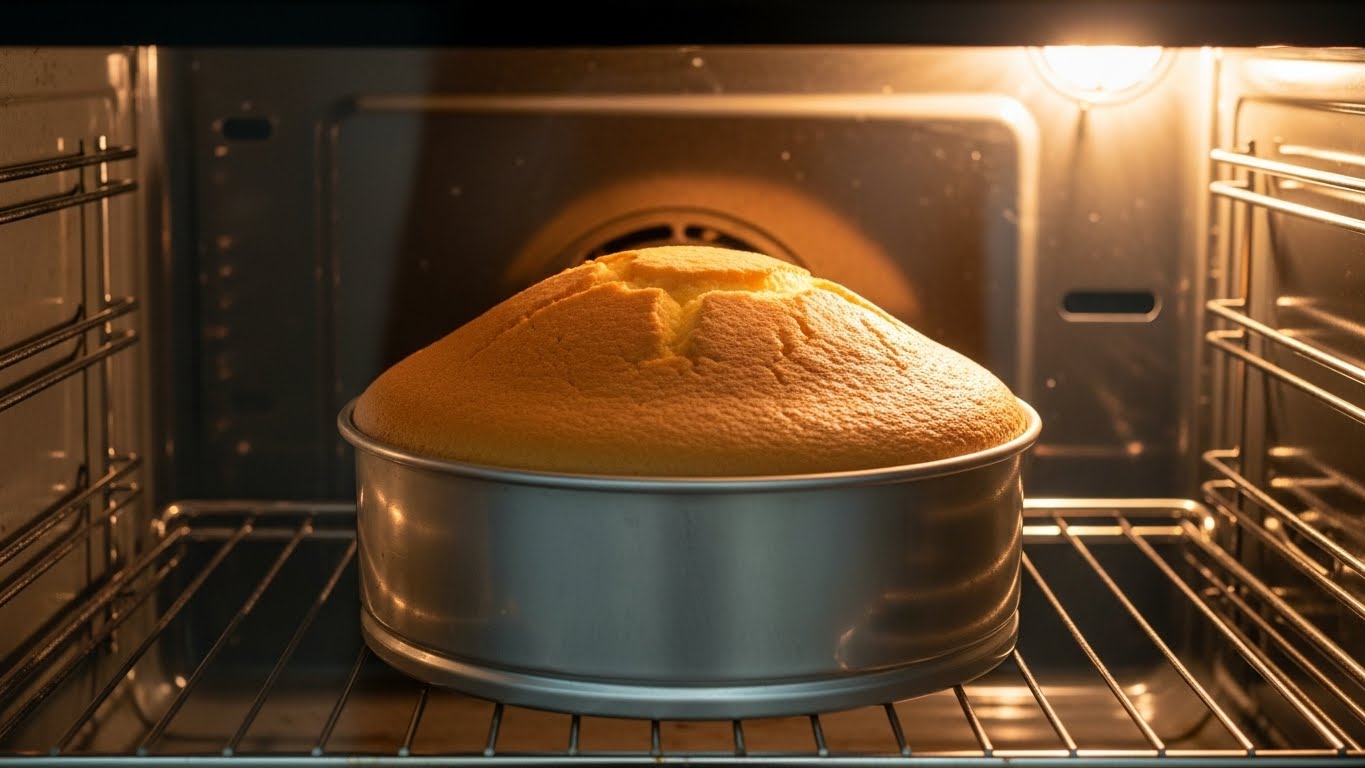
Opening the Oven Door
I know it smells amazing, and you want to peek. But every time you open the oven door, the temperature can drop by 50 degrees or more. If your cake is in the middle of rising (setting its structure), this sudden drop can cause it to collapse in the center. Use the oven light instead.
Ignoring the Cooling Process
Hot baked goods are fragile. The steam inside is still cooking the center. If you cut into a loaf of bread or a cake while it’s piping hot, you let the steam escape too fast, resulting in a gummy, doughy texture. Patience is a key ingredient.
Mastering Your Oven
Your oven is the engine of your bakery. Learning how to drive it is one of the most underrated baking tips for beginners.
Preheating is Non-Negotiable
Turning the oven on and putting the pan in 2 minutes later is a recipe for disaster. The oven walls need to be fully saturated with heat to bake evenly.
- The Rule: Turn your oven on at least 20 to 30 minutes before you plan to bake. Even if it beeps to say it’s ready, give it another 10 minutes to stabilize.
Hot Spots and Rack Positioning
Most ovens have “hot spots”—areas where the heat is more intense.
- The Test: Place slices of white bread on a rack and bake them. See which ones burn first. That is your hot spot.
- Rotation: To combat this, rotate your pans 180 degrees halfway through the baking time (quickly, so you don’t lose heat!).
- Rack Position: Unless specified otherwise, always bake in the absolute center of the oven for the best air circulation.
Reading a Recipe Like a Pro
Following a recipe seems simple, but there is an art to it. Before you crack an egg, do what chefs call “Mise en Place” (everything in its place).
- Read the Whole Recipe First: Read it from start to finish. You don’t want to be halfway through mixing and realize the dough needs to chill for 4 hours and you have to leave in 30 minutes.
- Prep Ingredients: Measure everything out into bowls before you start mixing. This prevents the panic of searching for the vanilla extract while your butter is melting.
- Check for “Divided” Ingredients: If a recipe says “1 cup sugar, divided,” it means you will use part of the sugar in one step and the rest in another. Don’t dump it all in at once!
Practical Tips for Specific Treats
Different baked goods require different techniques. Here are some quick-fire baking tips for beginners based on what you are making.
Tips for Cakes
The goal here is a moist, tender crumb.
- Grease and Flour: Always grease your pans and dust them with flour (or cocoa powder for chocolate cakes) so the cake releases easily.
- The Toothpick Test: Insert a toothpick into the center. If it comes out with a few moist crumbs, it is done. If it is wet, keep baking. If it is clean, you might have overbaked it slightly.
- For more detailed guidance on achieving the perfect sponge or avoiding a domed top, check out our deep dive on how to cake.
Tips for Cookies
- Chill the Dough: If your cookies spread into flat puddles, it’s because the butter melted too fast. Chilling the dough for 30 minutes solidifies the fat, leading to thicker, chewier cookies.
- Underbake Slightly: Cookies continue to cook on the hot baking sheet after you pull them out. Take them out when the edges are golden but the center still looks slightly soft.
Tips for Brownies
- The Crackly Top: To get that shiny, crackly crust on brownies, you need to beat the sugar and eggs together really well until they are pale and fluffy before adding the other ingredients.
- Cut Cleanly: Use a plastic knife to cut brownies; they stick less than metal knives.
Substitution Science
Eventually, you will run out of an ingredient. Knowing how to swap ingredients safely is an advanced skill that beginners can learn early.
- Buttermilk Substitute: If you don’t have buttermilk, add 1 tablespoon of lemon juice or white vinegar to 1 cup of milk. Let it sit for 5 minutes until it curdles.
- Brown Sugar vs. White Sugar: Brown sugar contains molasses and adds moisture and chewiness. White sugar creates crispness. Swapping them changes the texture, not just the sweetness.
- Salted vs. Unsalted Butter: Recipes usually call for unsalted butter to control the sodium. If you only have salted butter, reduce the added salt in the recipe by 1/4 teaspoon per stick of butter.
Cleanup and Storage Hacks
Baking is fun; cleaning up is not.
- Clean as you go: Wash your measuring spoons and bowls while the cake is in the oven.
- Storage:
- Crisp Cookies: Store in a jar with a loose lid (they need air to stay crisp).
- Soft Cookies: Store in an airtight container with a slice of white bread (the cookies will steal moisture from the bread and stay soft).
- Cakes: Frosted cakes act as their own seal. Unfrosted cakes should be wrapped tightly in plastic wrap to prevent drying out.
For a broader collection of wisdom covering everything from bread to pastries, don’t forget to bookmark our general archive of baking tips which we update regularly.
Frequently Asked Questions (FAQ)
- Why did my cake sink in the middle?
This is a classic question when discussing baking tips for beginners. It usually happens for one of three reasons:
- Underbaking: The structure wasn’t set yet.
- Too much leavening: Too much baking powder caused it to rise too fast and then collapse.
- Opening the door: A draft of cold air shocked the batter.
- Can I double a baking recipe?
In cooking, yes. In baking, proceed with caution. Doubling ingredients is fine math-wise, but it changes how the batter fits in the pan and how heat distributes. It is often safer for beginners to bake two separate batches rather than one giant double batch, especially for sensitive recipes like soufflés or meringues.
- Convection vs. Conventional Oven: Which is better?
A convection oven has a fan that circulates hot air. This cooks food about 25% faster and more evenly. It is great for cookies (crispy edges!) and pies. However, for delicate cakes or batters that need to rise steadily, the fan can blow the batter around or set the crust too early. For beginners, stick to the conventional (no fan) setting unless the recipe specifies otherwise.
- How do I know when my baking is actually done?
Trust your senses, not just the timer.
- Sight: Is it golden brown? Is it pulling away from the sides of the pan?
- Smell: When you can smell the aroma of the cake or cookies in the next room, they are usually close to done.
- Touch: Does the cake spring back when pressed gently?
Conclusion
Baking is a journey of trial and error. Even professional pastry chefs burn cookies and deflate cakes sometimes. The difference is, they know why it happened and how to fix it next time.
By equipping yourself with the right tools (hello, kitchen scale!), respecting the temperature of your ingredients, and resisting the urge to peek into the oven, you are already ahead of 90% of home bakers. These baking tips for beginners are your foundation. The more you bake, the more intuitive these steps will become.
So, tie on that apron, preheat your oven (fully!), and don’t be afraid to make a mess. The worst-case scenario? You still get to eat chocolate.
Ready to start your baking journey? Pick a simple recipe, like chocolate chip cookies or a yogurt loaf cake, and apply the “Mise en Place” technique we discussed today. You’ve got this!